October 29, 2011
Pin Craft Christmas Bell Tree Decoration using Pinflair components and Christmas Ribbon
|

|
| Pin Craft or Pinflair is the art of pinning fabrics, or sequins etc to shapes or forms. Pinflair Polystyrene shapes are an ideal medium, allowing easy construction. Use filigree etc for finishing. easy to make Christmas Craft project in less than an hour |
 |
Requirements
|
 |
Preparation
 |
Cut ribbon into approx 58 10cm lengths. This number may vary depending on the closeness of the overlays |
|
 
|

|
| |
Method
 |
Find and mark the centre point of the base of the bell. |
 |
Place a ribbon length on a flat surface face down |
 |
From the centre of the the ribbon, fold over end by 45 degrees |
 |
Fold over the other end the same way. |
 |
Place the ribbon on the base of the bell and secure the fold point the the bell with a sequin pin to just off the centre point you marked on the base of the bell. |
 |
The ribbon can be placed either face up or face down to provide a different finished effect. The bell illustrated was made with the face down. |
 |
Secure the fold two fold ends to the bell. |
 |
Repeat the process on the opposite side, and again at ninety degrees to them. |
 |
This will then give a cross structure over the base of the bell. |
 |
Repeat this again from the centre filling the for gaps between the ribbons. |
 |
Depending on the width of your ribbon, and the size of the bell, you may have to add extra layers |
 |
Once this initial round is completed, simply repeat the effect by adding more folded ribbon in layers, moving away from the base of the Bell. |
 |
Continue layering until you reach the top of the bell. |
 |
Fold over and ribbon ends and secure a filigree cap to the top of the bell to cover the ends, using a Teardrop Hatpin. |
| |
 |
 |
 |
 |
Finishing Effects
 |
Finish off the Bell by adding:
 |
A hanging cord to the Filigree Cap |
 |
Coloured Pearl Headed Pins to the sides of the bell. |
 |
Secure a filigree Ball to the base of the bell using a Teardrop Hatpin to represent the bell chime |
|
|
 |
Hints and Tips
 |
Try using an egg cup or cup to hold your bell upright while working on the base. |
 |
Use decorative paper strips rather than ribbon |
 |
Use Sequins or Bridal beads to add extra glitter to your bell |
 |
Use a thimble for easy pin insertion and prevent finger pain. |
 |
Use small lengths of ribbon on small bell sizes. |
 |
For the accomplished pinner, try using a thinner ribbon for a very detailed effect |
 |
Try using other polystyrene shapes as bases. |
 |
As an alternative to ribbon try using Christmas Fabrics, simply cut in lengths and folded in the usual way. |
 |
Try starting at the top of the bell and layer your bell the opposite way. |
|
 |
Please remember that young children will be attracted to your bell, so hang it safely out of reach from children on your Christmas Tree. |
 |
Guidelines on Pin Crafting |

|
 |
 |
|
|
 |
 Leave a Comment » |
  Christmas | Tagged: filigree, how to make a pinflair sequin bell, polystyrene bell, ribbon, sequin pins, sequins |
  Permalink
 Posted by Elaine
March 30, 2010

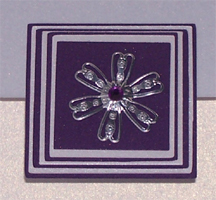
- Wedding Invitation

- filigree wedding invitation
Three fold wedding invitation using several alternate coloured squares of card with a filigree topper and a strass stone
The wedding details are typed and printed onto card and glued inside card
Alternatively the bottom flap can be glued at the outer sides and details printed onto card and placed inside the pocket
 Leave a Comment » |
  Wedding | Tagged: filigree, invitation, strass stone, wedding |
  Permalink
 Posted by Elaine


 Posted by Elaine

