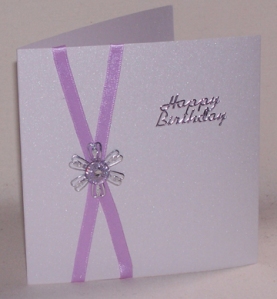
Quick cards
May 22, 2011scottish wedding card/invite
May 22, 2011Cricut
May 22, 2011Cricut
Use on a flat surface
Ensure front is on table and there is enough room to prevent the mat blocking
Blade 500-1500 cuts or 3 – weeks depending on paper/card used
Rotate the mat and use an older mat for thin paper
Use small piece card for smaller cuts and navigate blade using arrows
Unload —load last
if done right after cut and can cut again
Set paper size
and cricut will figure out size of card
Paper save
cricut will automatically work out amount of card to save waste of card
settings screen
change measurements from inches to cm
multi cut
default mat size
show previous cuts on screen
arrows to move through different selections
press ok button after you select-press ok button again to go to next menu-press settings button to exit
blade smaller no-shorter blade depth for light card/paper higher no –loger blade depth for heavy card
if cuts are torn decrease cutting speed if that not work change blade or adjust blade setting
pressure low=lightweight high=heavy card
Cricut tips 2
Size
Usully measured from the lowest point to the highest point
Cricut will cut what it thinks is the proportionate size
Real dial size Will cut the size you want
Eg cricut will cut a 2” letter in proportion to the height whereas the real dial setting will cut the letter at 2” in height
Portrait
The cricut default setting is landscape press portrait the blade will move to the left hand side of the mat and will cut across the card
Portrait can be used with -mix n match – fit to page- quantity- auto fill
Mix and match press on mix n match select all characters you want to cut you can2” shadow
Mix n match can be used with portrait – fit to page-quantity-auto fill -fit to length
Fit to page Cricut will cut the character to use the optimum amount of space proportionally
Fit to length Cricut will cut the character to the optimal length —- only works on landscape
Auto fill cricut will cut to fill the page as many characters that will fit onto size of card
Multi cut Use for thick board use the settings panel to determine how many times to cut
Centre point only works on landscape
Move blade using arrows to the centre point of the character you want to cut
Press centre point button –press cut button and the cricut will cut around the outer perimeter
Line return Cricut will create line breaks between cuts
Space Creates a space between characters usefull when using the cricut colour markers
Flip –Flips character
Cricut markers
The card must be placed on the right hand corner of the mat
Replace the cricut blade with a color marker
Make sure that the pressure and speed dials are at a low setting
Usually speed 3 pressure 2
Press on character to draw and press cut button
DO NOT UNLOAD THE MAT WHEN IT FINISHES DRAWING
Press the load button and replace the marker with the blade
Make sure the speed and pressure button is adjusted to suit card/paper you are cutting
Press repeat last button and the drawn character will be cut
Press the unload mat button when it finishes cutting
Note the machine will always start at the right hand corner if you want to draw and cut at a specific place on the mat use Design Studio or Gypsy
Cricut Embossing Folder
Cricut machine is used to cut and the Cuttlebug to emboss
Place embossing sheet onto the mat aligning it to the left corner of the mat
Load the mat and use the blade navigation arrows to place the blade to the right ha=nd corner of the embossing sheet
Press the paper size button and the cricut will display the new size
Choose the design to cut
Machine setting
Blade depth =6 (deep blade housing=4.5
Speed =3
Pressure =5
Multiple cut =2 (use the settings button to change the multi cut setting)
Select the size on the size dial
Press the cut button if the chosen size is to big the cricut will beep =change the size
Unload the mat and remove sheet –ensure that the the cut image stays together
Stick the whole sheet to the embossing folder (x2 mirror images)
Remove the release liner from one half of the sheet and stick into folder
Run the folder through the cuttlebug to make sure it is stuck properly and then remove liner from other half of sheet
Close folder and run it through the cuttlebug
The image should be split one on each half of the folder
Embossing folder should be ready
Place card into folder and run through the cuttlebug
******Emboss using the Cricut machine***********
Please note this method is not an official Provocraft/cricut method
This is done at your own risk
Lainesworld and Provocraft are not responsible for any damages as a result of using this tip
Remove the blade from the housing turn it upside down so that the blunt edge replaces the blade edge insert into housing —Use an old blade—
Place a silicone embossing mat onto cricut mat place paper/card on top
Vellum settings
Speed med
Pressure med
Blade 6
Foil settings
Pressure high
Speed med
Speed med
Blade 6
Card/paper settings
Pressure med/high
Speed med
Blade 6
Choose design –press cut and the cricut will work as normal but using the blunt edge the cricut will emboss
It is trial and error to find the right silicone mat and settings


 Posted by Elaine